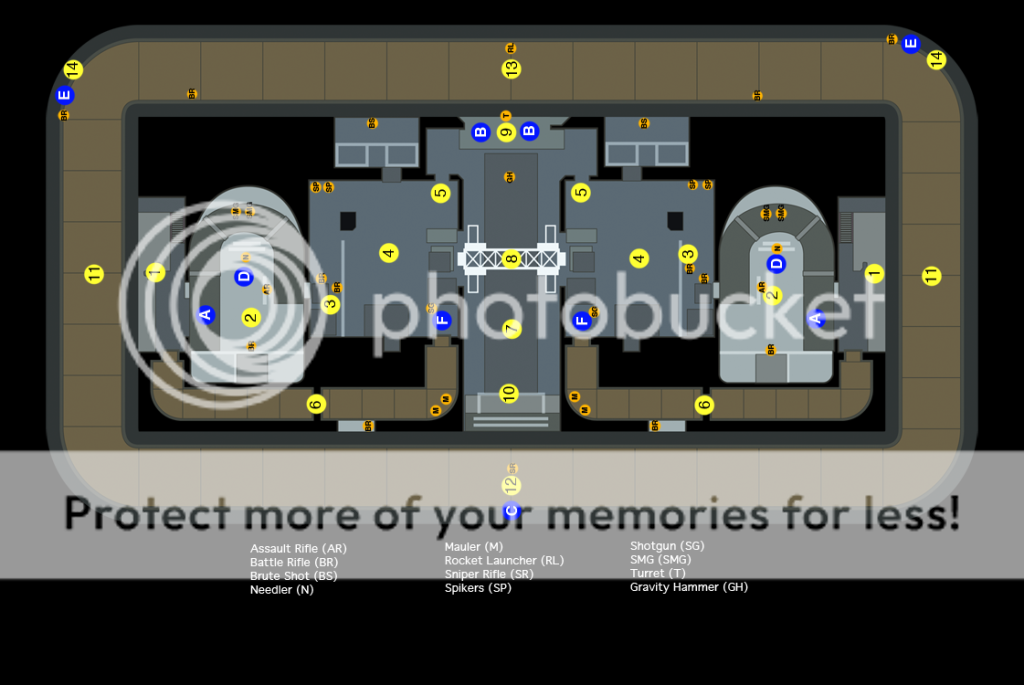
 Rat’s Nest is basically a giant circle, consisting of an outer street surrounding the entire map, two main bases and a large open area in the middle of the map, where Gravity Hammer and Camo are located. The map is symmetric in that both bases contain the same weapons and structure. Because the map is basically streets and bases, the players much choose whether to risk playing in the open streets, or to use the levels and terrain of their respective bases to their advantage. Both bases are also equipped with an adequate set of vehicles, while the middle of the map (Middle / Sniper Street) houses a neutral Ghost, given to whoever reaches it first this allows for fast and efficient maneuvering around the map.
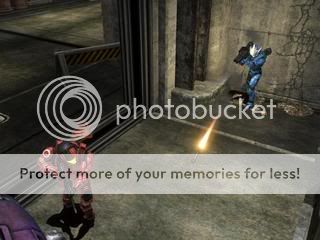
The Middle is a highly traveled spot in the map, as it has both Camo and the Gravity Hammer, with a Detachable Turret above the Hammer. With no place for cover, traveling in this section is unadvisable, but also is unavoidable as it houses power spots and weapons, advantageous to the player.
As the map is symmetrical, both team’s bases are exactly alike, a mirror of the other. Each base consists of two rooms complete with multiple ramps and stairs housing many different weapons. The main important weapons in the bases would include the Shotgun and the BR. Both bases also include a hangar with two Mongooses and two Warthogs, more than enough opportunity to get your fill of vehicular manslaughter. Along with a bottom level, the bases have a separate top level, this being the preferable vantage point as you are able to see enemies below and ahead. The top level can be used to as a traveling route to various places in the map that the bottom level cannot reach (i.e Turret and Bridge) as well as a Regenerator (located on the route you would take to Turret) that can be very useful in-game. The bottom, while a little more risky spot to be in, contains the Needler, the BR, and most importantly the Shotgun and Bubble Shield.
1. Hangars
Other Names: Red Base, Blue Base, Red Spawn, Blue Spawn
In most game variants your main spawn is in one of the Hangars. You can differentiate which base you spawn at by the Red or Blue markings on the walls inside of your base in front of you, include these in your callouts (Ex: Blue Hangar). 2 Warthogs, 2 Mongooses, a trip mine and 2 frag grenades spawn in each Hangar.
2. Objective
Other Names: Flag, 1st BR, Home
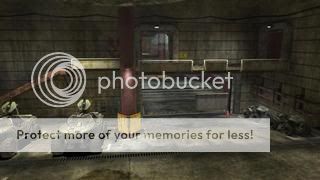
From Hangar when you spawn and walk straight you will enter objective. Objective is comprised of two different levels. Lower objective serves as the home for your flag in CTF and your bomb in Neutral Assault, Assault and One Bomb. A Battle Rifle spawns on the right wall (AKA – 1st BR), a needle alongside the left wall and an assault rifle on the floor when you enter. Upper Objective forms the shape of a horseshoe and is accessible by the stairs that run along the inside of the room. 2 SMG’s spawn in upper objective.
3. Brick
Other Names: n/a
If you continue to walk straight through Objective to the next room you will enter is brick. Brick got its name because the section is made of bricks. On the left side in lower brick you will find 2nd BR and to the right spawn 2 spikers. Connected to Upper Objective is Upper Brick, where a BR spawns.
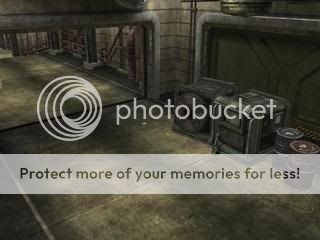
4. Garage
Other Names: n/a
Brick is a small section of the room that is known as Garage. This room is called Garage because of the signs on top of the stairs that say, “Garage.” Garage is made of 2 levels (Upper and Lower) and has 3 doors (Middle Bridge, Ops Center, Halls) in upper garage and one main/large door in lower garage that connects to Mid (Middle of Map.) The landing of the stairs on the left that lead to upper garage is the Brute Shot spawn, if you continue up the stairs you will find a regen. Straight forward and down the stairs the Shotgun spawns on the left and a bubble on the right, this door connects to Mid.
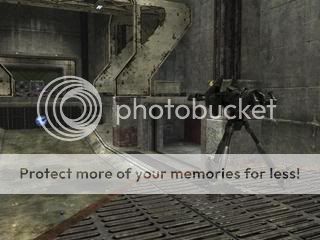
5.Ops Center/Turret
Other Names: n/a

Through the left door in Upper Garage you will enter the “Ops Center,” and find the Turret, which rests above mid. If you continue to walk across Turret, you will enter the enemies Upper Garage.
6. Halls
Other Names: n/a

From upper Garage, the door across from the Ops Center is known as the Hall Entrance. Through this door you will enter a Hall which contains blue or red streaks of paint on the wall depending on which base you are in. If you exit the hall through the first door you see, you will enter the outer street that circles the entire map and a BR spawns at this doorway along with 2 frag grenades. If you continue through the hall, either blue lights or red lights will illuminate your way and you will end at the Upper Hangar of that base. Each hall contains two maulers and 2 plasma grenades.
7. Middle
Other Names: n/a
Mid is the area that connects both bases and is has multiple sections. These include Turret, Bridge, Gravity Hammer and Camo.
8. Bridge
Other Names: n/a
This is the only Bridge in the map, hence its name. Bridge connects Upper Red and Upper Blue Garage. Below the bridge on Mid Street the Warhammer and 2 plasma grenades spawn.
9. Turret
Other Names: n/a
Turret is located overlooking Mid and it connects each Ops Center and Upper Garage. Below Turret is a large doorway that leads to Main Street.
10. Camo
Other Names: n/a
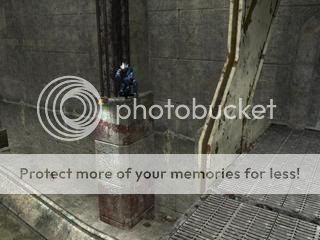
On the opposite side of Turret the camo spawns in the middle with a grav lift on each side. On one side of Camo there is a set of pipes, on the other side there is a group of boxes. Use either of these to jump on the ledge above Camo to sniper.
11. Blue Street
Other Names: n/a
The outer vehicle track/street that runs outside the blue base, connecting to Snipe and Main Street. This also connects to an entrance to Blue Hall.
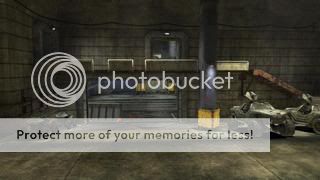
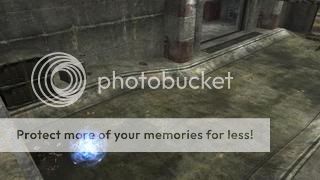
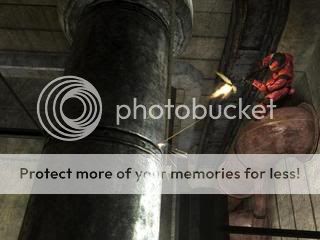
12. Red Street
Other Names: n/a
![Photobucket]()
The outer vehicle track/street that runs outside of the red base, connecting to Snipe and Main Street. You may enter Red Hall through the entrance on this street.
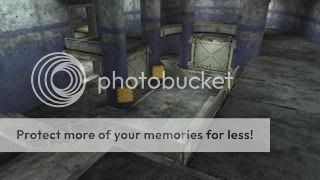
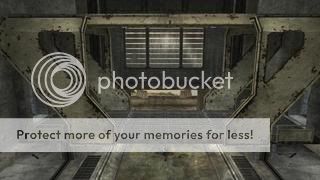
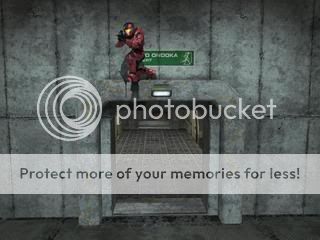
13. Sniper Street
Other Names: n/a
![Photobucket]()
The vehicle track/street that sniper and ghost spawn at. This is accessible from Camo or Blue/Red Street
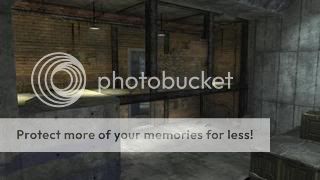
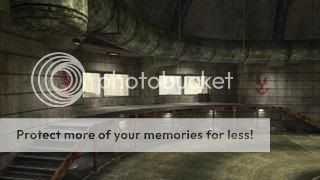
14. Main Street
Other Names: n/a
![Photobucket]()
The vehicle track/street that rockets spawn at, along with a BR and two frag grenades at each light pole. This street is connected to the large entrance to lower mid below turret.
15. BR Ramp and Platform
Other Names: n/a
Blue Street and Red Street each contain a platform between the bases hangar and main street. This platform is made of two sets of stairs and spawns one BR and 2 plasma grenades. This is also considered a secondary spawn
Game Variant Strategies
Slayer Based: Team Slayer and Big Team Slayer
Objective Based: Assault, Neutral Assault, and Multi Flag CTF
General Slayer Tips
Weapon control is more important in Slayer based game types rather than in Objective based game types, as the sole objective is to kill.
Players should utilize the Vehicles on the map, especially in Big Team Slayer, as there will be a lot of targets and a lot of roadways for you to drive on.
Do not put the player with Rockets into a vehicle, as it is harder to shoot a target while moving, and losing / wasting Rockets can seriously effect your game.
Take advantage of the high grounds in this game type, as there are many chances for one to jump down from the high ground and assassinate an unsuspecting player.
General Assault Tips
Because there are two bombs in Assault, deciding whether to be Offensive or Defensive is crucial. Offensive play and Defensive plays differ immensely, but in the end, both ways of play can succeed tremendously.
Both team’s bombs will be located in their respective lower section of Objective, marked by an Icon above it stating how far the bomb is located away from your player.
An enemy Bomb takes 4 seconds to disarm, so once your team has successfully planted the Bomb, and it reaches that 4 second mark, have your team go back to your base and escort the new Bomb Carrier (your teammate who should already have the new bomb) back to the enemy base for a quick second cap. Doing this in sync can win you the game in a ridiculously short amount of time.
General Neutral Assault Tips
In Neutral Assault, the single Bomb is located directly in front of Rockets, which can be a very dangerous situation.
Because there is only a single Bomb in this game type, an Offensive set-up is favored over a Defensive set-up.
Being the first team to arrive at the Bomb is crucial, as gaining control over Rockets will quickly follow after the Bomb is obtained.
If you are the first team to arrive and the opposing team is no where to be found, have one player get Rockets while the rest of the team escorts the Bomb Carrier to the opposing base, and camp in the upper levels of the Middle, as the opposing team might arrive to the scene late, only to be blown to bits by the deadly Rockets.
Camo is very important in Neutral Assault, as a single Player with both Camo and the Bomb can annihilate the entire opposing team’s chance at a defense.
An enemy Bomb takes 4 seconds to disarm, so once your team has successfully planted the Bomb, and it reaches that 4 second mark, have your team go back to your base and escort the new Bomb Carrier (your teammate who should already have the new bomb) back to the enemy base for a quick second cap. Doing this in sync can win you the game in a ridiculously short amount of time.
General Multi Flag CTF Tips
Multi Flag is a lot like Assault except faster paced. The Flags do not have a countdown to score, once your flag hits the opposing team’s flag point, you score, so it is a very real possibility you could win the game in less than two minutes.
Instead of going directly through the Middle, as one might in Assault, have your team utilize either the Mongoose or the Warthog and drive to the opposite side of the map. Because these vehicles are fast, the opposing team will have a harder time both finding and killing your team.
Offensive Plays
In an Offensive type set up, the entire team (or at least 3 of the 4 teammates) will escort the Bomb Carrier or Flag Holder. The strategy is to basically take the fastest route to the opposing team’s base (going straight through Middle), with teammates taking the shortest amount of time to gather the power weapons and equipment (i.e. Rockets, Bubble Shields, Camo, Shotguns), and helping to ambush the opposing team’s Objective.
In Assault or Neutral Assault, have a single player get the Shotgun and the Bubble Shield, they will be the one to camp in the opposing team’s Objective while the bomb is being armed, when attacked, this player will throw down the Bubble Shield on top of the bomb and camp inside it with the Shotgun. This can be a deadly combination. Also, if possible, have another player attempt to steal the opposing team’s Shotgun & Bubble Shield as well, controlling these weapons is crucial.
After scoring the first time, have a player (preferably with the Shotgun), camp inside the opposing team’s base, eliminating chances of defensive positioning from the opposing team.
Defensive Plays
In some ways, Defensive play is closely related to Offensive play. Have two players rush Rockets, while one player grabs Shotgun, Bubble Shield, and Camo. All players should return to Objective.
Instead of rushing out to find enemies, wait until the opposing team makes the mistake of entering the base, where they will be ambushed.
The player in possession of Rockets should crouch above a doorway, or somewhere on the upper level of their team’s Objective.
Be sure to have all players rotate between positions, making sure all openings/doors entering the base are covered, so as to make sure that no one can sneak in undetected.
If your team is NOT able to grab Camo, be on the sharp lookout for a player on the opposing team sneaking in with the bomb or the flag, as they can do this easily.
If your team is successful in ambushing the opposing team’s attempt to arm their bomb or Capture the Flag, have one player stay inside the Objective (preferably with a Shotgun and Bubble Shield) while the other players escort the Bomb Carrier through the middle of the map.
Be sure to switch up the ways your team delivers the Bomb or tries to Capture the Flag, as teams will be quick to catch on to your strategies if it is used in excess. (Example: If your team has carried the Bomb directly through the Middle for 2 out of 3 successful Bomb Plants and are getting killed before even exiting your base, try getting into a Mongoose and driving through the back Streets and getting the opposing team from an unexpected position.)
Advanced Tactics
As this map has a lot of edges that stick out and random pieces of architecture, it allows for multiple hiding spots to be accessed via jumping.
Tubes
The green tubes that run along the top edges of the streets can be accessed by jumping on the red tubes (located to the left and right of Sniper Spawn), and then crouch jumping on to the green tubes. You can walk along these tubes as far as the beginning of Rocket Street. This can be very helpful to your team as you have the higher vantage point, and can detect any unsuspecting walking enemies.
Doorways
Crouching atop the multiple doorways and entrances to the bases can be VERY helpful in a sneak attack. Not many enemies decide to look on top of a doorway, or to even think of the possibility of an aerial attack from an enemy. Nearly every single doorway or entrance in the map is able to be jumped upon, take advantage of this, and you could have your enemies running for their lives.
Bridge Pillars
This jump can be a little more difficult to get the hang of, and is not recommended if you cannot accomplish it at least 80% of the time, as it will give the position of those who can manage to reach it away indefinitely. Only do this jump if your team has control of the Turret, as getting shot from behind is never pleasant. Jump from the Bridge to the pillar located to the left or right. You can stand on this pillar to escape an oncoming enemy, or to ambush any unsuspecting enemies crossing the Bridge. Also, this spot is invisible to any enemies located at Camo or Sniper Spawn.
Camo Pillars
Located to the back left and right of Camo, these spots also allow for you to be unseen by an enemy at Sniper Spawn. Camping here with Rockets is both valuable and dangerous. Be sure that your team has control of Turret and Bridge before trying to sneak attack an enemy coming from Sniper Spawn.
Visit http://www.pmsclan.com